|
Hair
If you are really focused on your equitation career then its time to cut
your hair. The ideal length is about mid shoulder blade. Its short enough to easily put in a bun but long enough to not have
to tease much.
You will probably have to get a helper to do this so I recommend you do your hair
way before you have to get your horse ready (like before the show session starts) and then just wear a baseball cap till you
have to get ready so it stays nice.
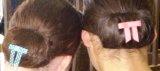
How to make a Pretty Equitation Bun
What you will need
- hair elastic
-
bobby pins
- spray gel or maximum hold hairspray
- hairbrush
- straight hair, if it is not straight naturally, then straighten
with a flat iron. It will make the bun sleek
Procedure
NO TEASING THE HAIR! Teasing the hair makes it fuller, but also gives you split ends and
flyaways. If you tease, you don't get the nice smooth equitation look. This technique will work even if you have thin hair
and will make a nice full bun.
1. Brush your hair back into a ponytail at the nape of your neck, as low as you can
and secure with a hair elastic. Make sure it is tight so that it doesn't get loose later. Spray any flyaways.
2. Take your ponytail of hair and flip it up and hold against your head. You
can spray where you will pin barrette to help hold.
3. Secure the hair against
your head with one of the barrettes. Make sure the barrette is pretty close the elastic. Your hair should now be fanning across
your head above the elastic and barrette. If you have really thick hair, you can spilt it into two pieces and secure with
two barrettes. Smooth hair with hand.
4. Now take the hair
net and spread it open. Hold an end in each hand and then twist your hands in opposite directions. There will now be a twist
in the middle of the hair net.
5. Fold at the twist and line up the edges of the net. The hair net should
look almost like it started out, but now doubled and it should be half the size.
6. Now take the hair above the barrette and fold it
down towards your neck. Hold with one hand at the elastic. Your hair should look almost like a bun. Here is where you start
over if the bun will be too high or too low for the derby or hat you are wearing. Adjust where the elastic and barrette are
placed to fix the problem.
7. Without letting go of your hair, take the hair net in the other hand and
place it over the "bun" you have created. Start at the top and middle and work your way down both sides at the same time towards
the bottom. Make sure you have all the loose hair in the net and the ends are tucked in. If you have really long hair, you
will have to fold the ends up under the rest of the hair, towards the barrette. The goal is to not have any ends of hair showing.
8. This is where practice comes in. You should now have a rough bun that is
semi attached to your head by the barrette and elastic. Start to use hair pins to secure the bun to your head and create the
shape you want. Don't be afraid to push or pull the hair into the shape that you want, be it wider or more oval. I usually
push the bun a little flatter on the head to make sure that it isn't sticking out and flopping. Use hair pins to secure all
the way around. Depending on the hair and how you want the shape, you can use anywhere from 8 hair pins to over 30.
9. Once you have pinned the bun into place, make sure there are no flyaways
above your ears or around the bun. Use bobby pins to keep flyaways down.
10. Once everything is pinned down, start spraying with hairspray. You want the
sides of your head pretty slick so that you don't have hair sticking out. Even spray the bun, especially if your hair is on
the curly side.
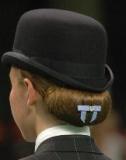
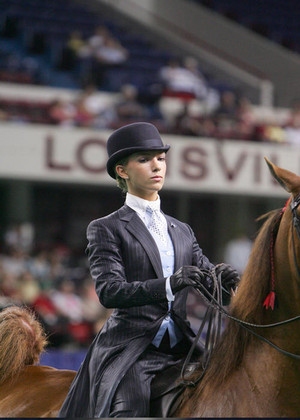
| Pretty Bun and perfect derby combo |
|
Suit
Pinning Your Coat
You should pin your coat ot fold back the lapel. It gives a cleaner
line and helps you look slim.
What you will need:
2 small or medium safety pins
Your clean show coat hanging on a coat
hanger
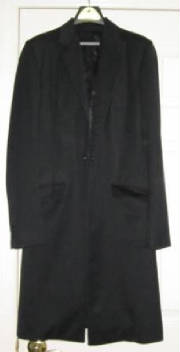
With your coat hanging straight on
a hanger with the front of the coat facing you make sure the pocket flaps are out of the pockets and that the coat is buttoned.
| Start with coat hanging on a hanger. |
|
| From the button pull the coat back |

|
| under the pocket flaps |
| Pin the inside of the pocket |
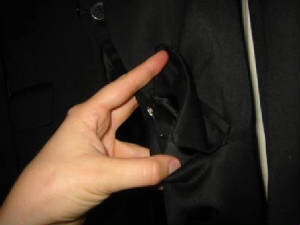
|
| Focus the pin so its to the top of the pocket and |
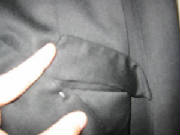
|
| more to the inside |
| Make sure the pin does not show |
|
The point is to hold the flap back but to let the coat flow. May take some practice so make sure you practice before the show or give yourself
enough time when getting ready to get this done. When your class is over make
sure to take pins out to prevent holes in your coat.
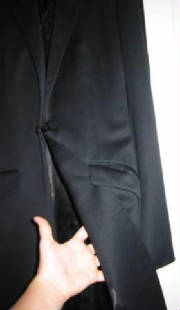
| End Result |
|
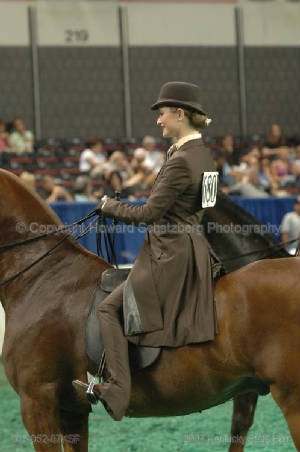
| Now what big part about her position is incorrect? |
What you will need:
Clean show shirt
White electrical tape
With gloves on have your sleeves buttoned
and pull over the wrist making sure that at least the tape on the gloves is covered.
Now tape the shirt a little behind the wrist. When you are putting your
coat on make sure to pull your shirt cuff out from the coat sleeve.
| End Result |
|
| Gives a little peek at your shirt cuff and add some panache to your outfit |
How to cut a perfect
back number (rounded corners):
What you will need:
Your number
Scissors
Pencil
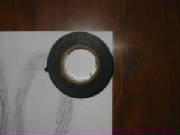
A roll of electrical tape
Something with a straight edge that has
some length like a foot long ruler or a clipboard edge
First take the hanger off of the back. Then hold the roll of tape up to the corner and trace the curve with the pencil. With the scissors cut the traced curve. If
you want to reduce the size use your finger width or bend your finger using the middle bone and mark the spaces with the pencil,
this is just to make sure there is equal amount of white around the number, then make a straight line with the straight edge
and pencil. Cut with scissors. If
you do it right at the first show you can keep the number and use it as a template for the rest of the year. Remember
to remove the metal hanger. If you have to use a metal cutter then just fold it and try to flatten it as much as possible.
| Place tape on corner for an always perfect curve |
|
| End Result |

|
| This is also the correct spot to secure your number. About 4 inches (one hand) below collar |
You want to pin your number about 4 inches below the bottom of your collar
between your shoulders because it helps straighten your shoulders and makes a sleek line.
How To Pin Your Number
What you will need:
4 number pins or magnets (I recommend magnets since they don't pop off)
Cut number
Coat
Prodecure:
With coat front facing towards wall, place number on back about
4 inches under collar in between shoulders.
Take one number holder (pin or magnet) and place on corner of number
then with the other hand in the coat with the back of the holder place and secure in coat.
Repeat 3 more times.
Step back. And make sure coat is hanging straight.
Is the number straight?
Is the number evenly distributed on both sides of back seam?
If not then fix.
How to tape your boots
What you will need:
Electrical tape
Somewhere to place your foot so you can push your heel
down and hold your leg up like a trunk or bench
Clean show boots
Procedure:
Put your boots on.
Lift your leg up so you can tape your boot without
having to bend all the way over and place the ball of your foot on the edge to push your heels down.
Tuck the loop of the boot inside the boot and push
the back of the boot to your leg.
Tape securely but not tightly around your leg to hold
in back of boot.
Now let foot down.
Is it too tight? Or is something poking you? If so redo it.
Repeat on other foot.
The reason why we tape our boots is so when a rider pushes her heels down and out it prevents the
back of the boot sticking out through the pants which creates an unflattering appearance and broken line.
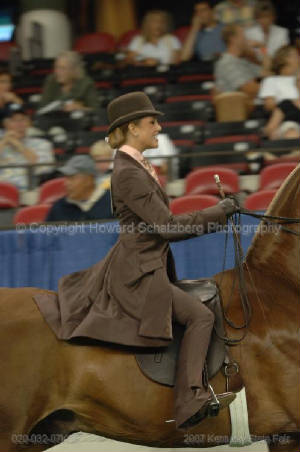
| End Result |
|
| See the smooth line of the back of her leg. This is ideal. |
|